MaskCreator Software
-
LCD/DLP image output via HDMI
-
Allow customization in display area and grid numbers
-
Automatic mask generation
-
4x interpolation on the measuring data
-
4x measuring grid resolution
-
Can be Gaussian blurred into fully resolution mask profiles without pixelization
-
Frequently updating
Our patent pending software controls the display to show patterns that from 0-255 brightness for each grid. Then the software will take all the data (255 x the number of the total grids) into account, and use advanced machine learning algorithm to find the best possible mask profile for your printer.
In this way, the MaskCreator can compensate the differences in light output no matter it's from the light source, the display panel, light path or the video board/driver.
We have also designed the patterns in a way that only the sensor is exposed to the UV light, not you.


Fully Normalized Light Output
Works with
Creation Workshop
NanoDLP
what is mask?
A mask is a digital gray scale image layer created by measuring every spot of the light output on the LCD panel.

Figure 1. Design diagram of XAYAV MODEL V
The light output, without a mask, is not uniform across the entire LCD panel during printing. Figure 2 shows an example of how the light out looks like. The higher the value means the brighter the light output. Figure 3 shows a 2D version of the same light output profile as Figure 2.


Figure 2. An example of un-masked light output. Figure 3. 2D version of the same light output.
Why does a mask necessary?
A nonuniform light output means you do not have the same UV intensity across the entire LCD panel. Normally, for a MODEL V, the center of the LCD is brighter than the edge area. The difference sometimes can be as high as 25%. If you are printing something fairly large, it means either there is part of your print are over-cured or under-cured. Over-curing usually causes loss of details and Under-curing usually will lead to printing failures.
With a mask image layer displayed on the LCD together with your printing images, the light output can be close to 100% uniform if the mask is properly made. Figure 4 shows the comparison between a properly-masked print sample and un-masked print sample. Printing without a mask on MODEL V is tested to be just fine if you are not looking for an absolutely perfect print. A lot of our print sample is printed un-masked. However, a mask is always recommended to ensure the best printing quality possible.


Figure 4. An example of a masked print sample (on the left) and un-masked print sample (on the right).
The tests are not preformed on a XAYAV 3D printer.
How do I use a mask profile?
You can download our pre-configured universal mask profile for Creation Workshop and NanoDLP in the DOWNLOAD page. Visit our TUTORIAL pages to learn how to configure the mask profile on Creation Workshop and NanoDLP.
NOTE that each printer can be slightly different due to certain manufacturing processes. This Mask profile should provide at least 90% uniformity on all MODEL V printers.
How do I make a PERFECT mask profile for my printer?
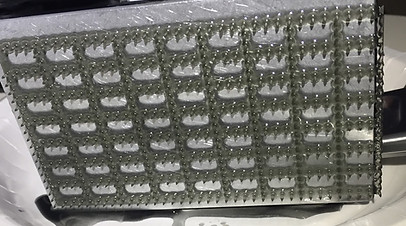
You can use XAYAV MaskCreator and its software to make a custom mask profile for your printer. MaskCreator uses a LDR sensor to measure the UV output from your LCD and send the data to its software to create the mask profile. MaskCreator software also allows you to import png. printing files and overlay the mask profile to them. So you can create masked printing files with if you are using printing software other than Creation Workshop or NanoDLP.
You can also use XAYAV MaskCreator to create your custom mask profile for other DLP and LCD 3D printers. You can make your own measuring grid for your printer and MaskCreator software will generate a mask profile based on your printer's specification.
Can I use the MaskCreator on printers other than MODEL V?
You can use XAYAV MaskCreator to create your custom mask profile for other DLP and LCD 3D printers. You can make your own measuring grid for your printer and MaskCreator software will generate a mask profile based on your printer's specification.
When and how often should I re-measure the mask profile?
It is recommended to re-measure the mask profile when you have replaced, moved or repaired the image displaying unit (DLP unit or LCD panel), the UV source, the UV light guide (such as light hood, optical fiber, optical guide interfaces) or any other parts that may cause changes to the light output. It is also recommended to re-measure the mask profile every 500 hours of printing time as the UV light source and the LCD panel may have noticeable aging effect.
Special thanks to Will Kostelecky, Johnson Yeh and Ralf Rollmann.

